Tasks are typically generated automatically when customers reach out through different channels—like calls, emails, or chat. That way, nothing slips through the cracks. But sometimes, you might need to create a task yourself.
Let’s say a customer calls with a special request that needs follow-up, like a product customization or a billing question that requires approval. Instead of trying to remember it later, you can quickly create a task, assign it to the right team member, and set a due date to keep things moving.
Use this guide to learn how to create a task and ensure it’s properly assigned and tracked.
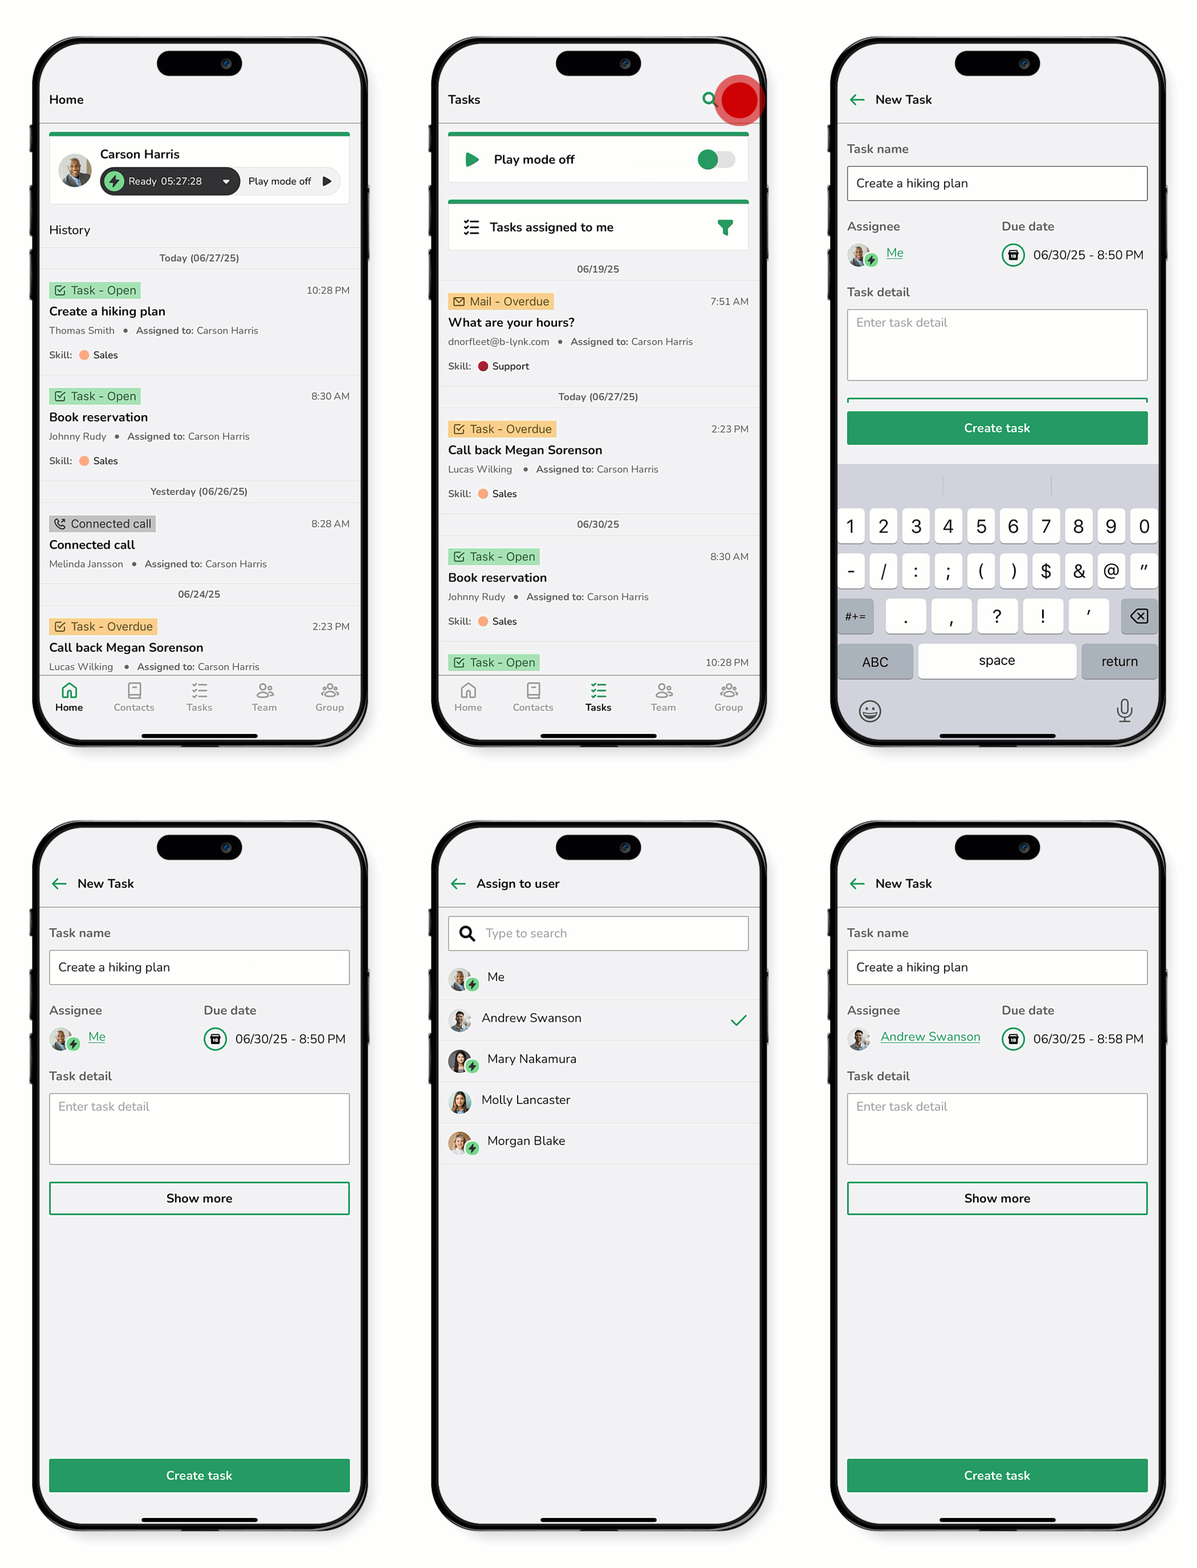
- Tap Task.
- Tap the plus icon
 to start a new task.
 - Enter a Task name.
- Choose an Assignee.
- By default, the task is assigned to you.
- To reassign it, tap the profile icon, then select a team member from the list.
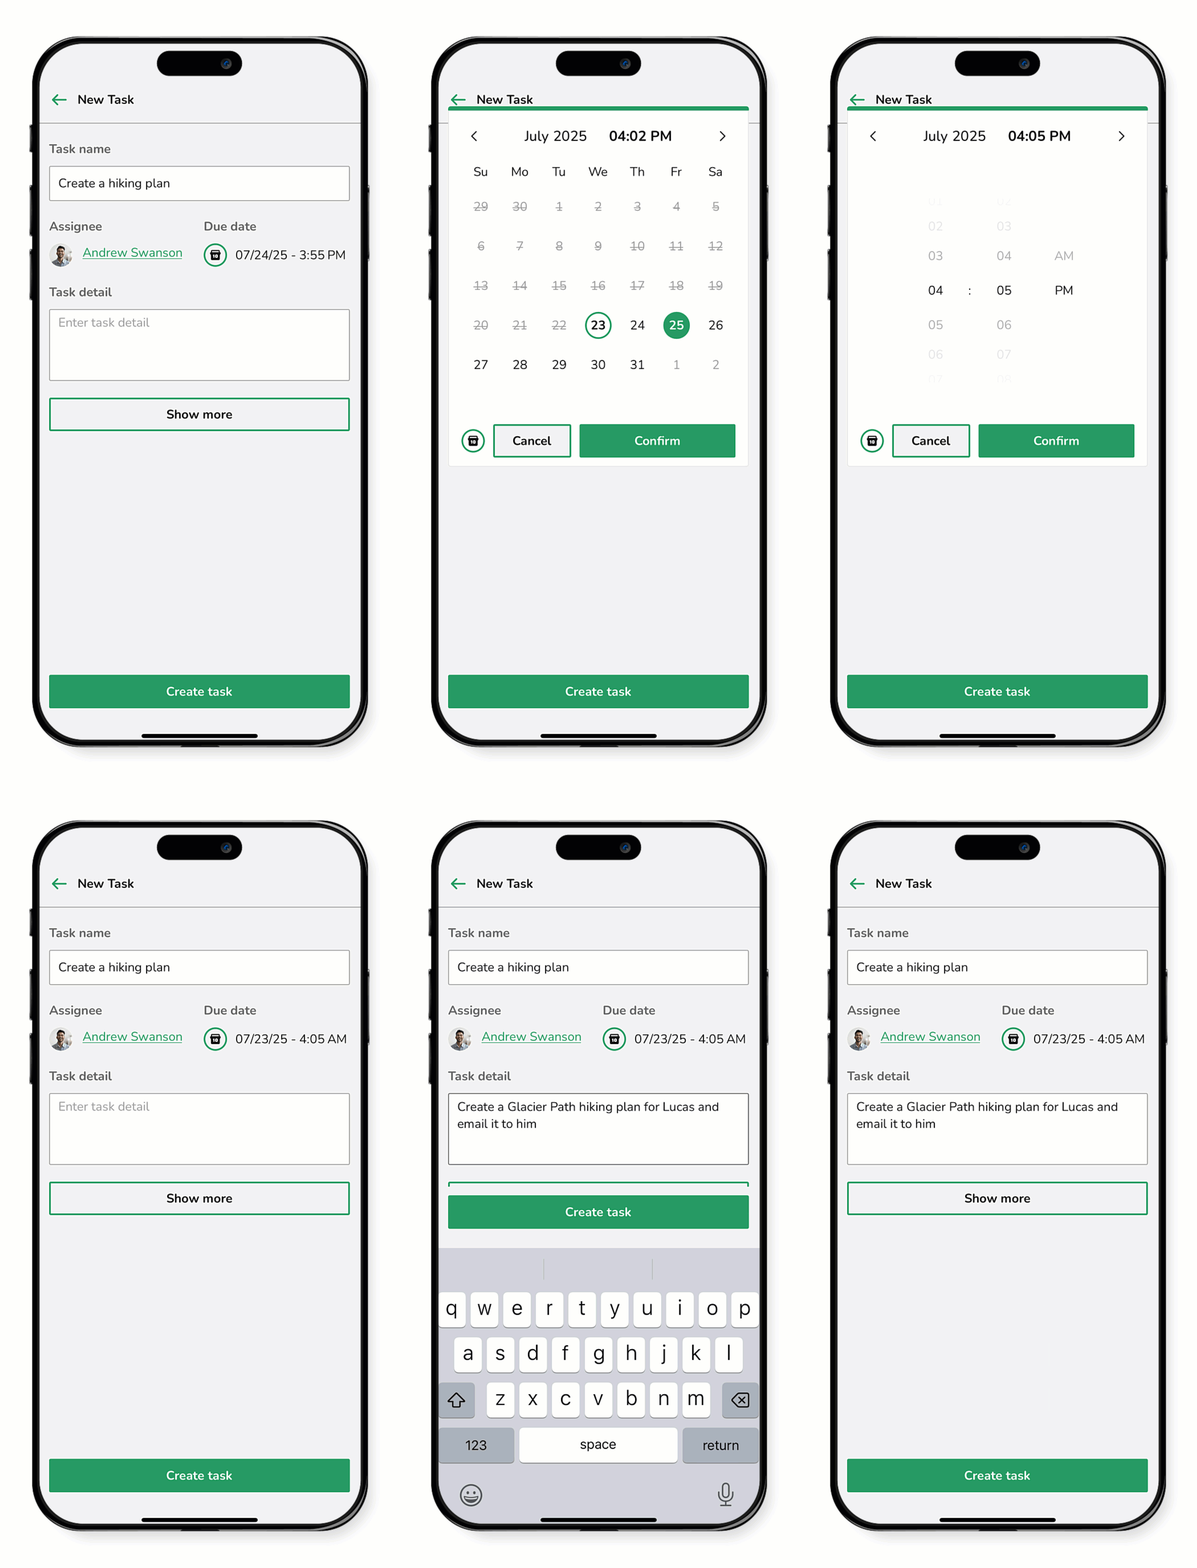
- Tap the calendar icon
 , choose a due date, select the time to edit it, enter the desired time, and then tap Confirm.
 - Enter the Task detail to describe the task.
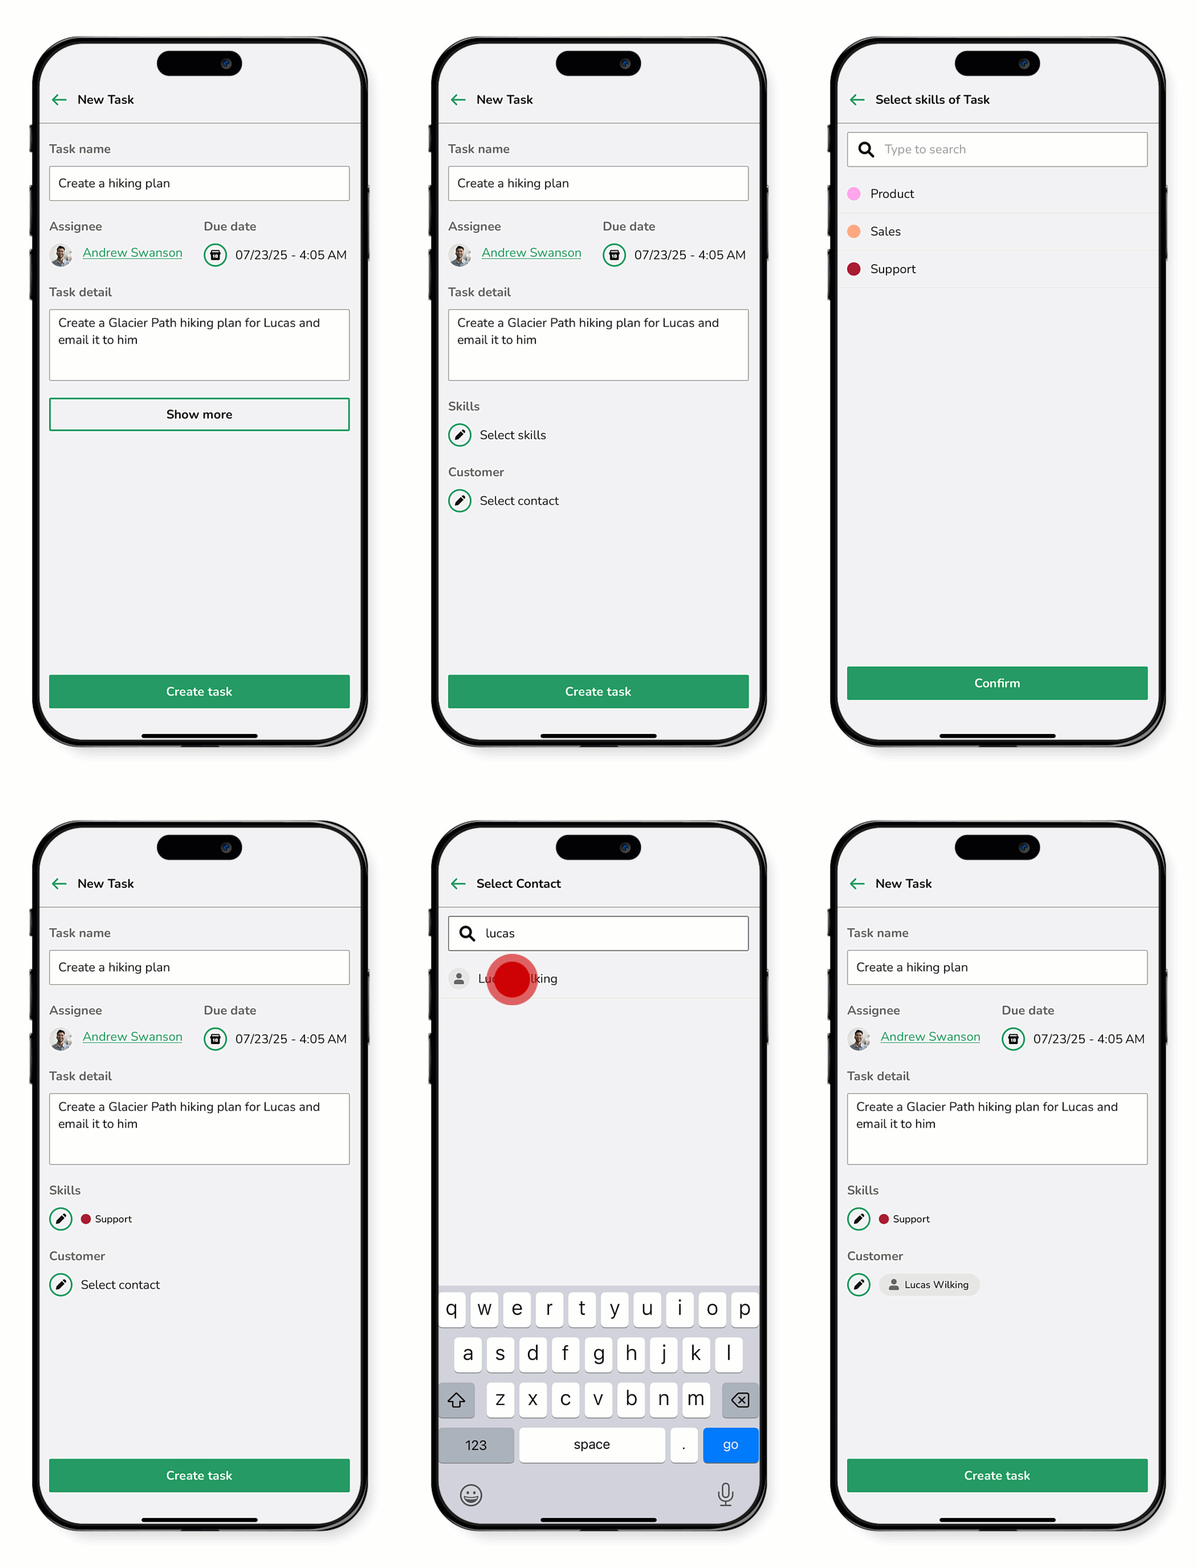
- (Optional) Tap Show more to expand additional fields:
- Add a Skill - Tap the edit icon
 , select the relevant skill, then tap Confirm.
 - Add a Customer - Tap the edit icon
 , then choose a contact from the list or use the search box, then tap Confirm.
 - When finished, tap Create task.


