
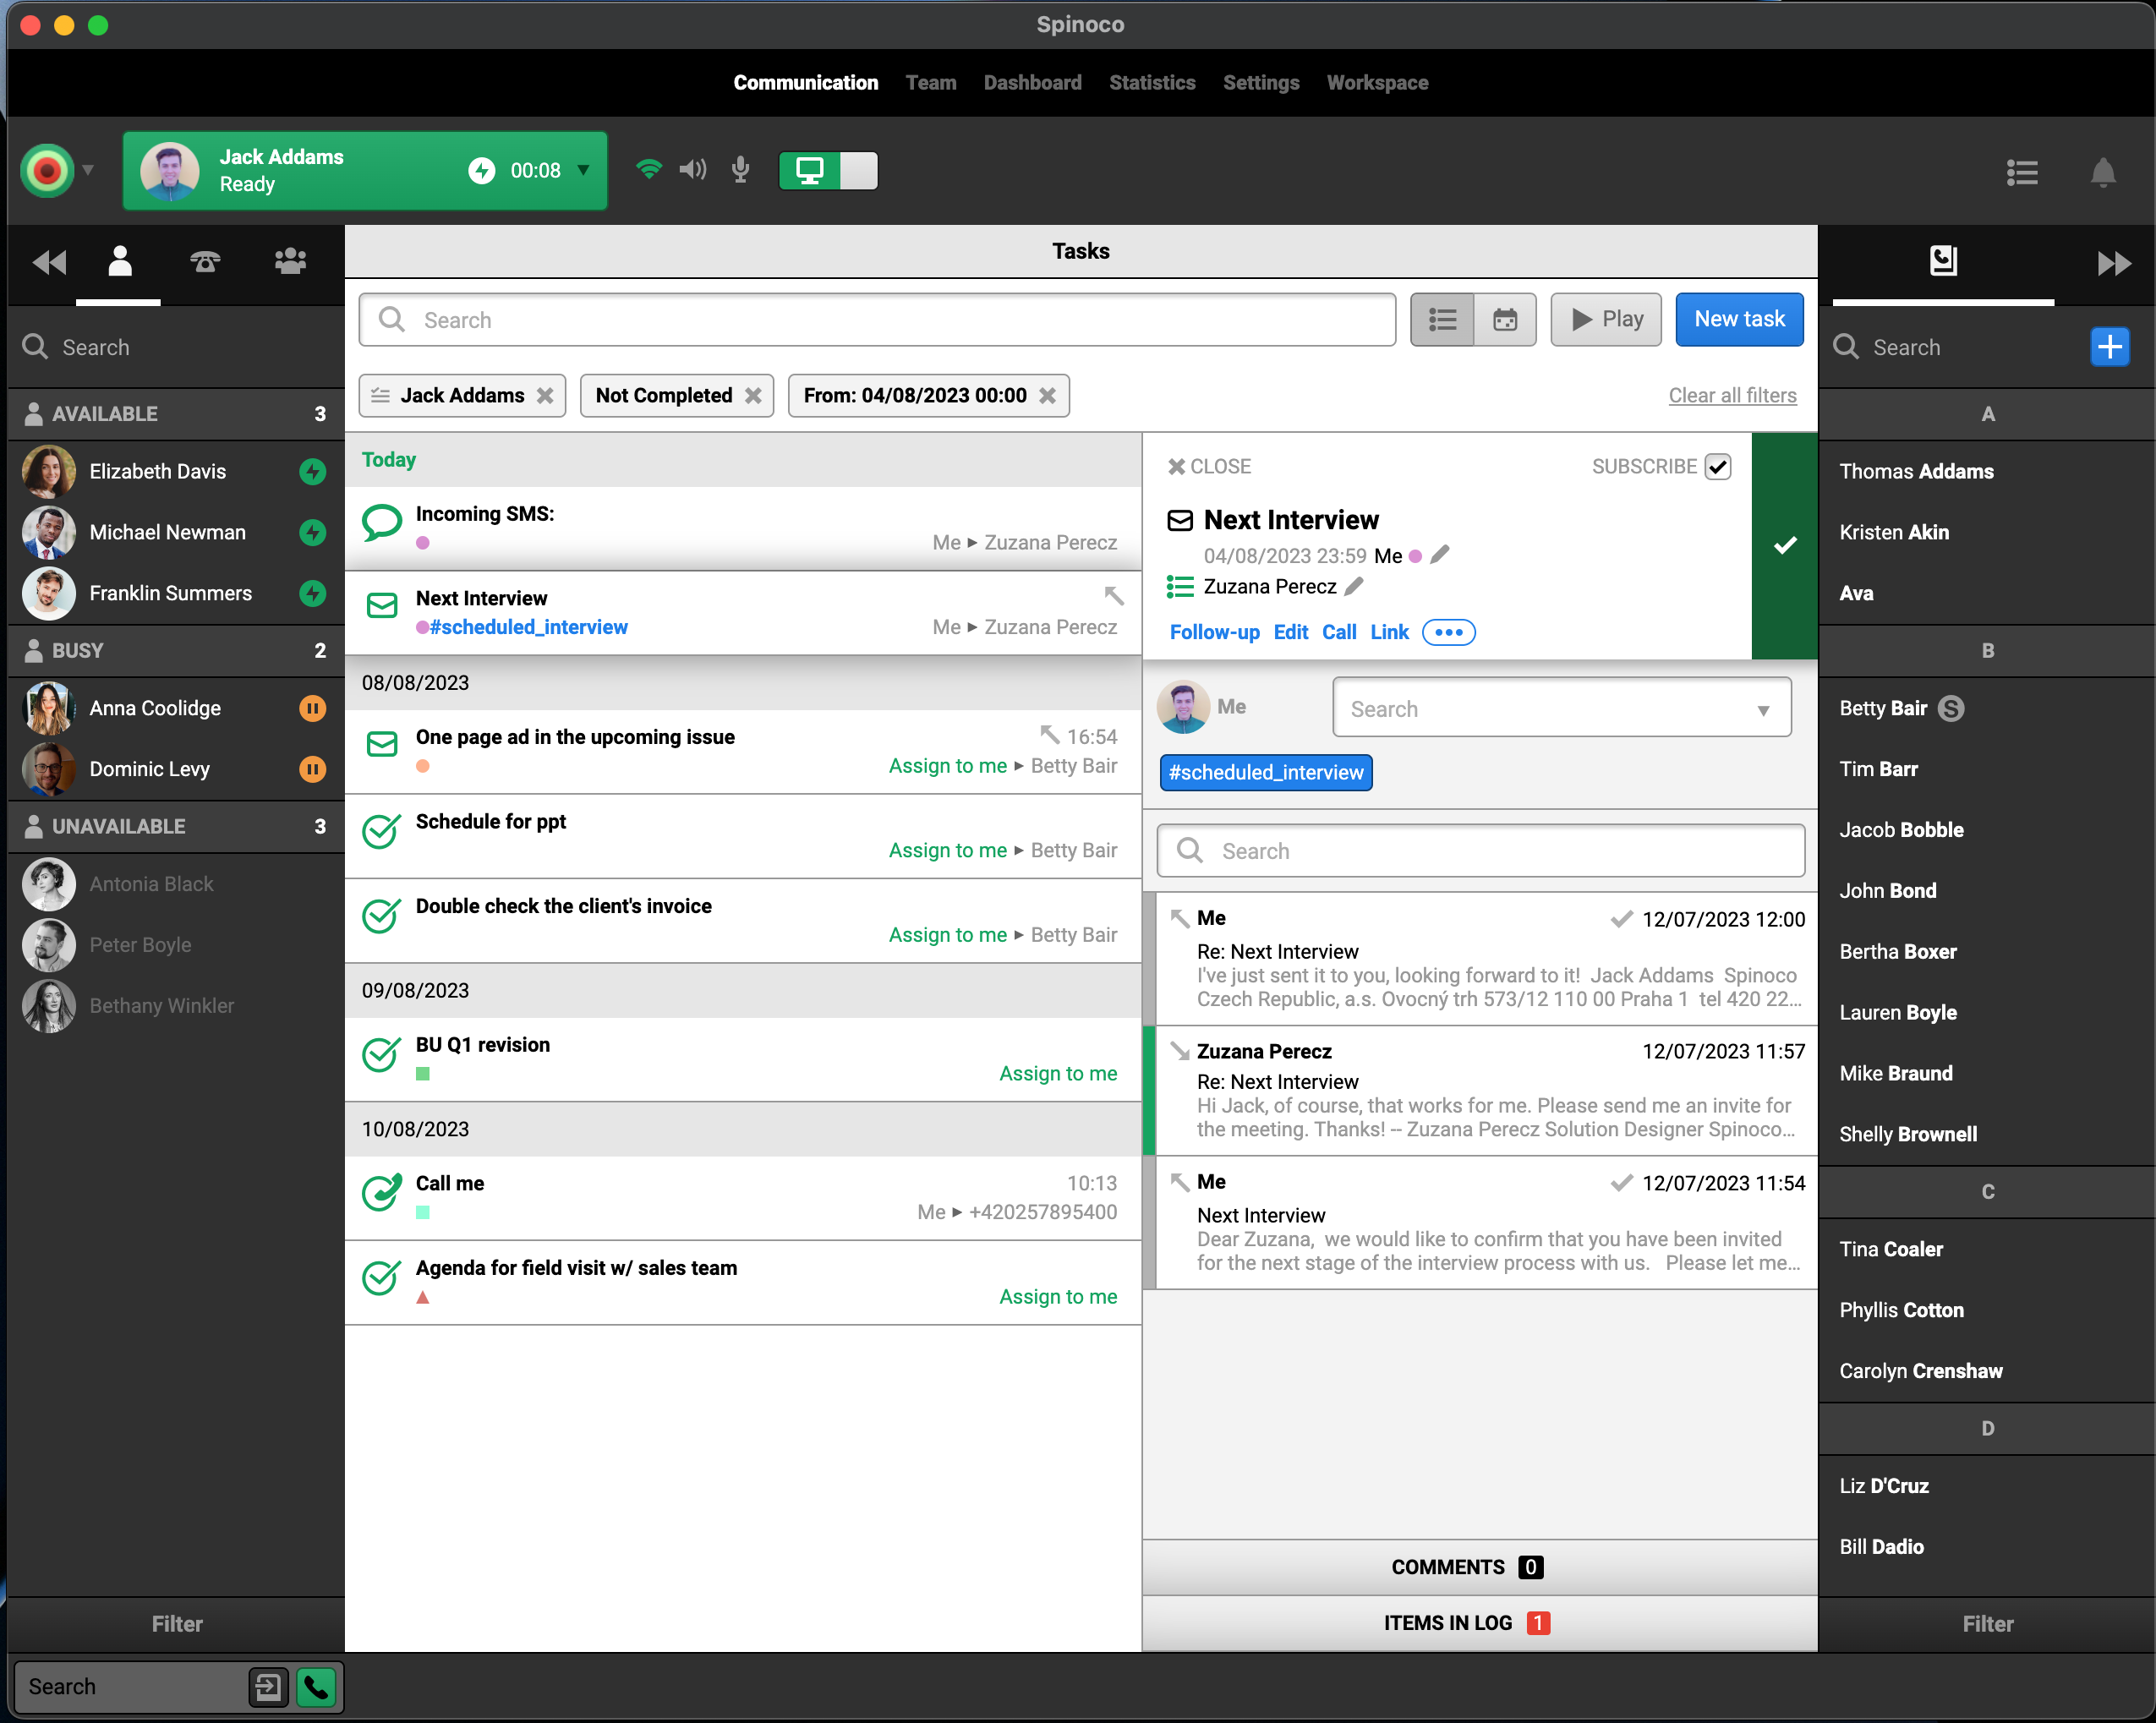
When you first open Spinoco, you will start out on the communication screen. As the name suggests, this is where all communication in Spinoco is carried out. Here's what it looks like:
In this article, let's go over the main sections of the user interface.
Starting out at the top, you will notice a big green button with your name in it (and a profile picture, if you have one). This is where you can change your status. Statuses are an important concept in Spinoco, and you can learn more about them here.

Next, there is the left-hand side panel. This panel is used for internal communication with your colleagues, who also use Spinoco. In the default tab, you can initiate one-on-one conversations with your team. The remaining tabs can be used to call your team's devices (hardware phones) and to group chat, respectively.
Moving over to the right-hand side panel, this is where you can communicate with anyone from outside of your team. It is a shared address book, and it's where all your contacts (customers, suppliers, etc.) live. Each contact has its own communication card through which you can initiate communication, and where you can see any notes about the contact and communication history.
Last but definitely not least, you have the middle part of the screen, where all your tasks live. Every piece of communication within Spinoco is in the form of a task. You will notice that you can work with all the different communication channels here - SMS, email, calls, etc. You will always be assigned tasks that are relevant to you as determined by the tasks' skills. To help you manage your work, as well as to provide meaningful data about your business, you will use hashtags.
Equipped with this basic understanding of the interface, you can now dive deeper into the tutorials on this page!