To modify chat templates, first ensure that you have access to the “Workspace” tab and the permission to modify and save templates.
You can assign this permission to yourself or another administrator by navigating to the Teams Screen, Settings, then selecting the edit button next to the user's name, assigning the “Workspace” access, and then enabling the permissions for templates in the “Permissions” tab. Please note that the Enterprise license is required for managing templates.
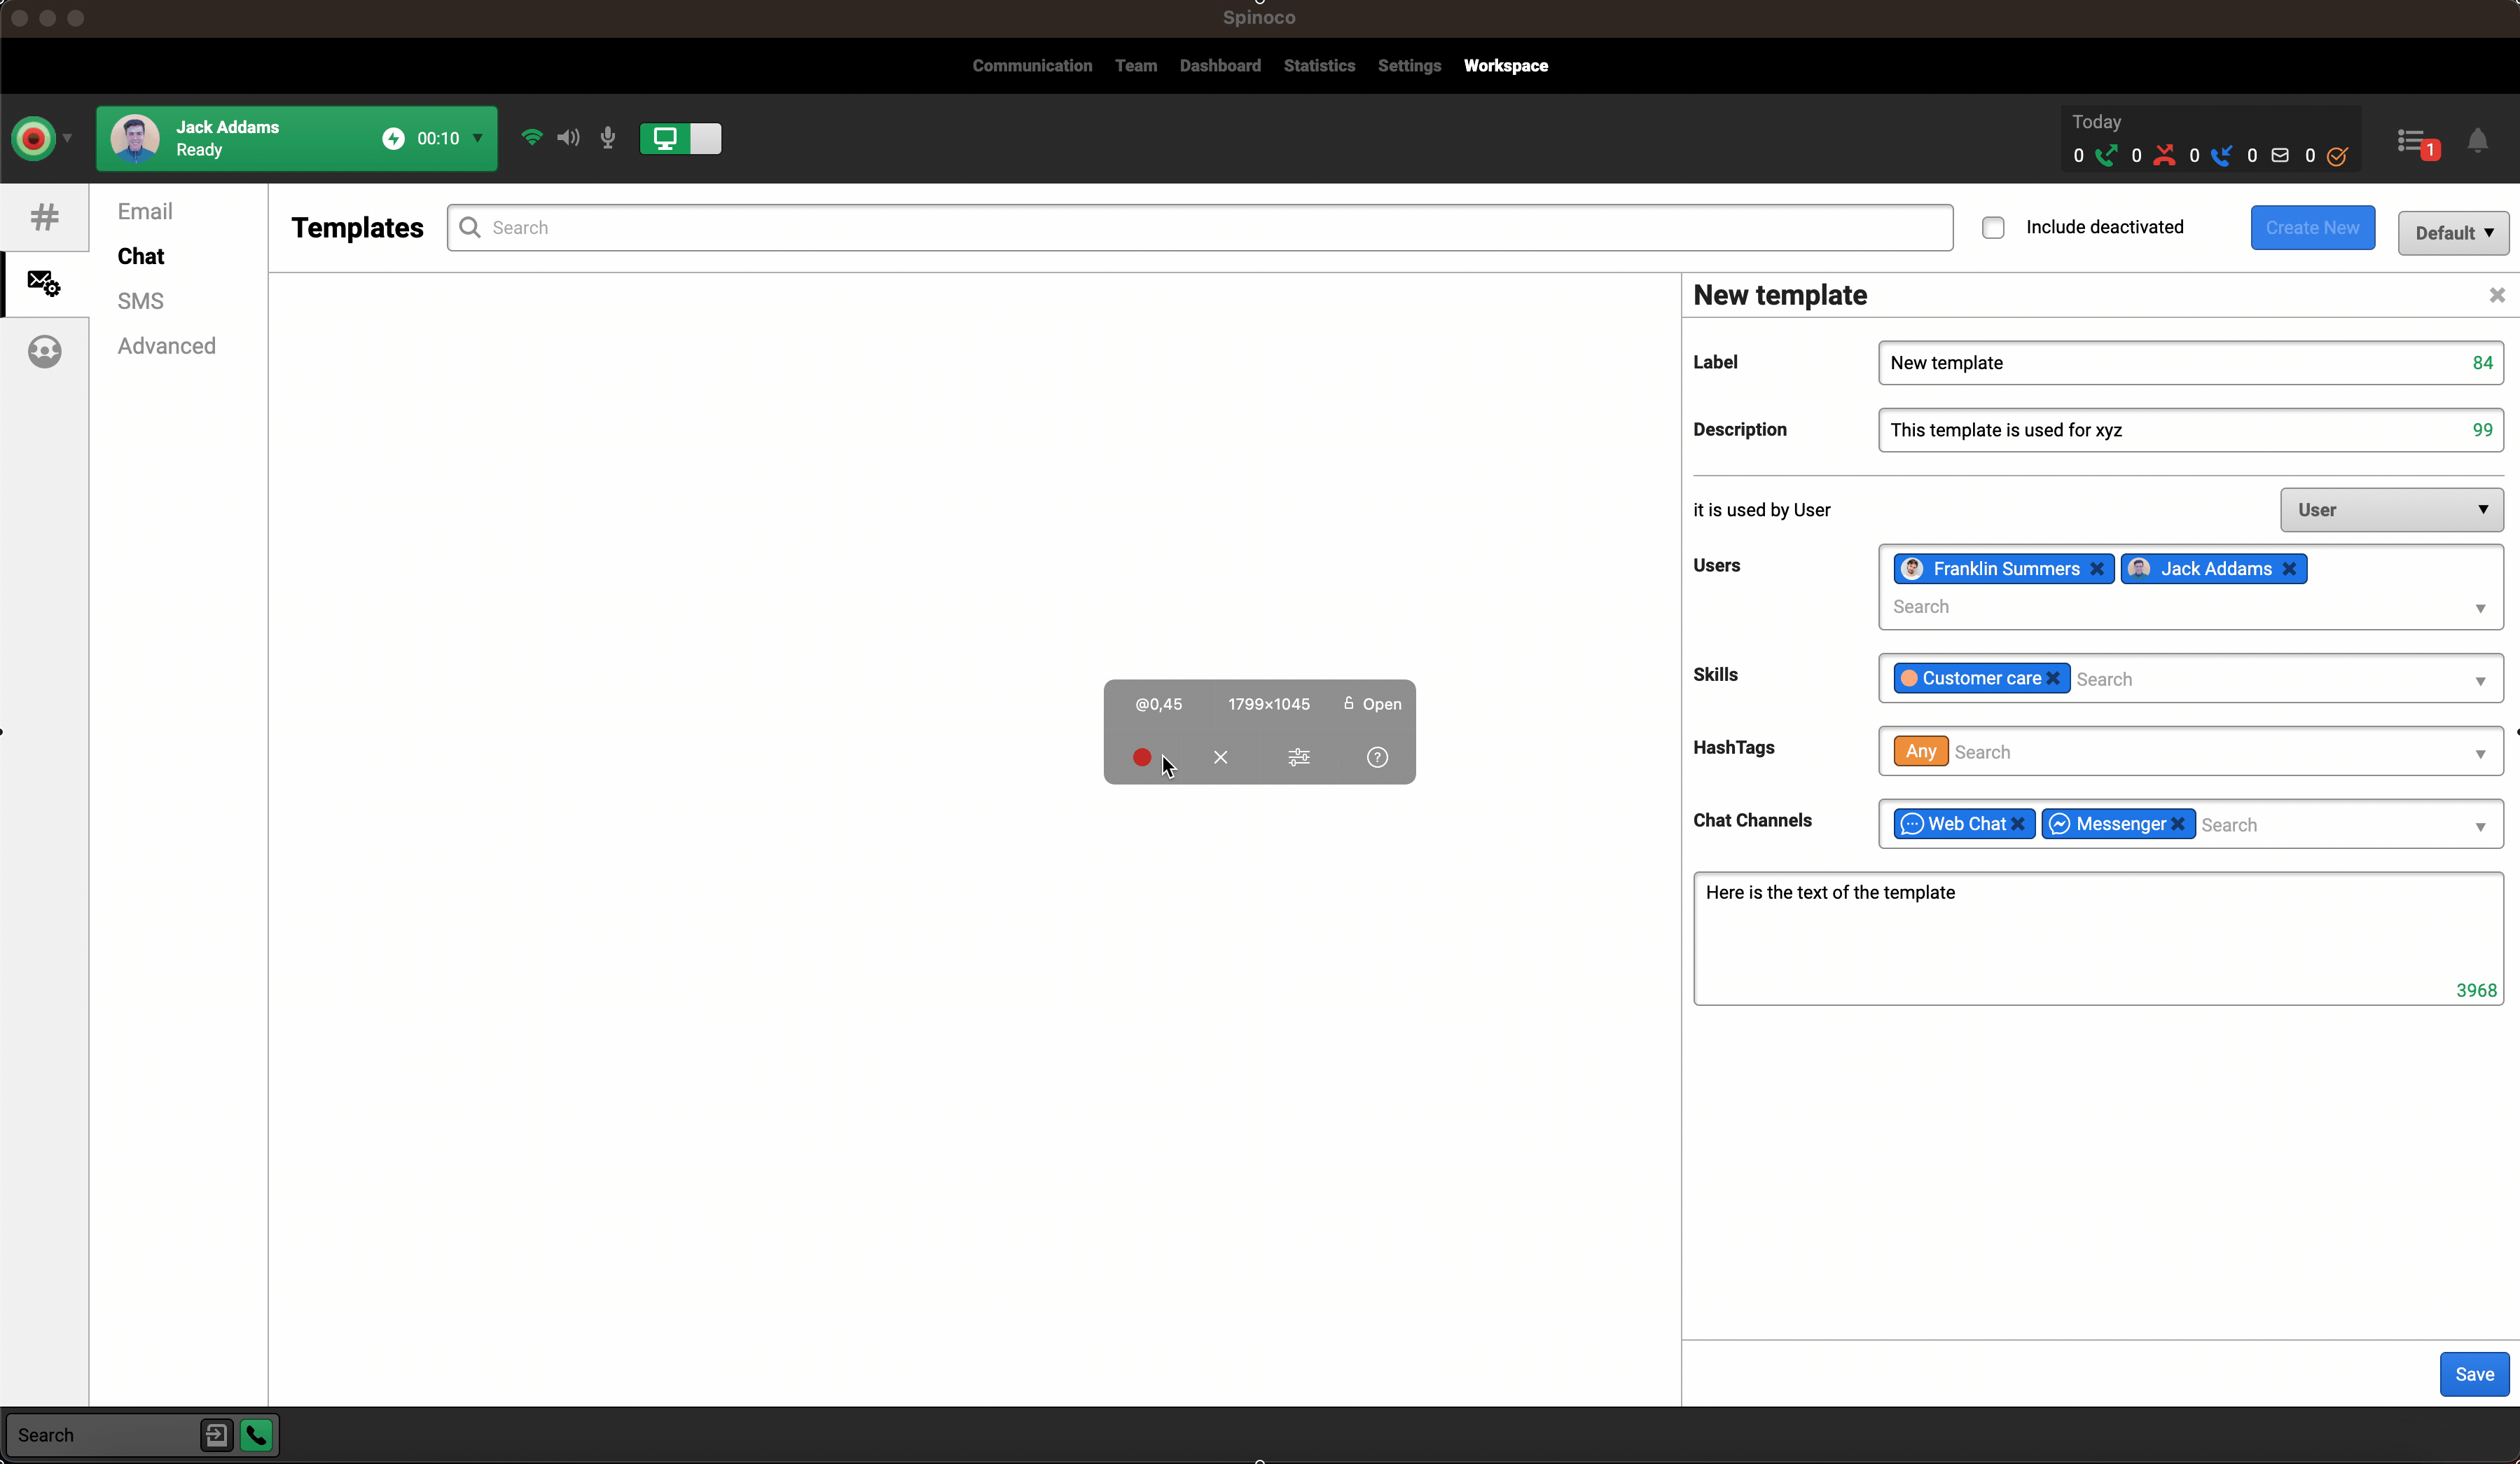
To create a new chat template, navigate to “Workspace”, Templates tab, then select “Chat” and hit “Create new”.
Fill in the details in the form:
Label: This is the name of the template based on which users will be able to find the template in the list of templates
Description: Add a short description explaining what the template is to be used for
Users: Specify which users should have access to the template. Leave as “Any” if the template should be accessible to all users.
Skills: Specify the skills the chat tasks should have for the template to be available. Leave as “Any” if the template should be accessible for all chat tasks regardless of skill.
Hashtags: Specify the hashtags the chat tasks should have for the template to be available. Leave as “Any” if the template should be accessible for all chat tasks regardless of hashtags.
Chat Channels: Specify the hashtags the chat channels for which the template should be available.
Text: Specify the text of the template.

When ready, hit the “Save” button at the bottom.
Finally, hit the “Activate” button and follow the on-screen instructions to activate the template.
Now, the template is accessible to the specified colleagues when chatting with customers.