To generate the API key, navigate to the Team Screen in Spinoco, select the Settings tab, and select the user for whom you want to generate a key. If you need to create a new user, follow the tutorial here.
For the given user, click on the API Keys tab at the top of the user's screen.
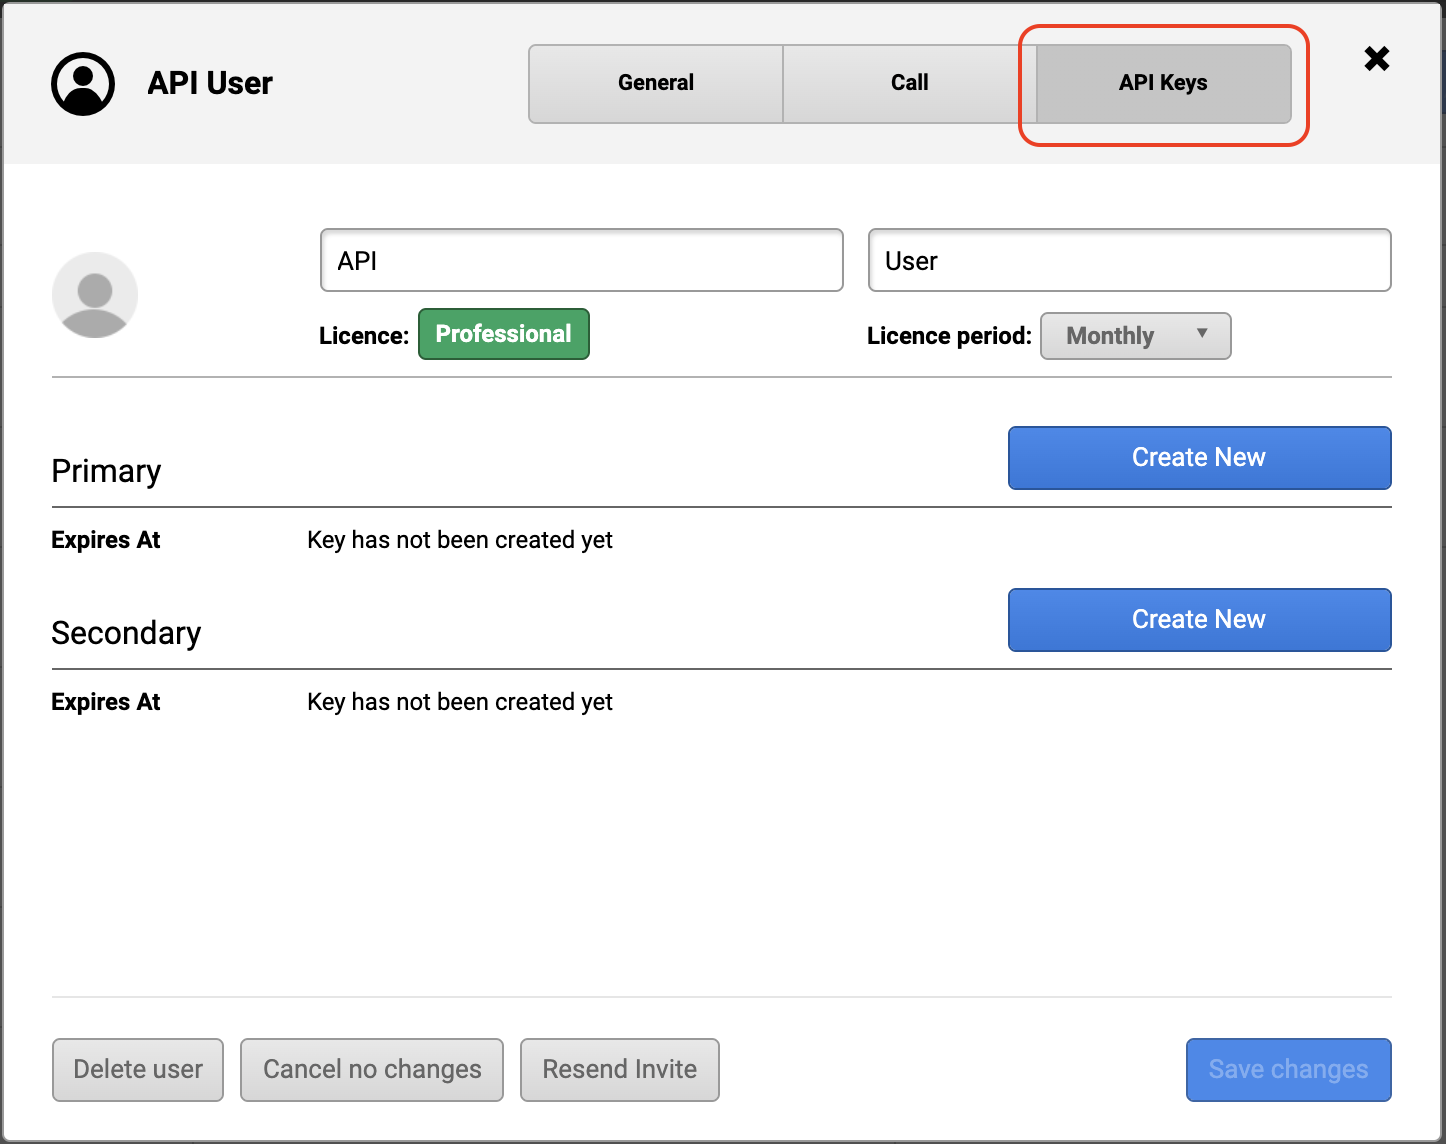
You have the option to generate up to two API keys. The process for generating them is exactly the same, so we will demonstrate here on the Primary key.
Click the “Create new” button on the Primary key line.
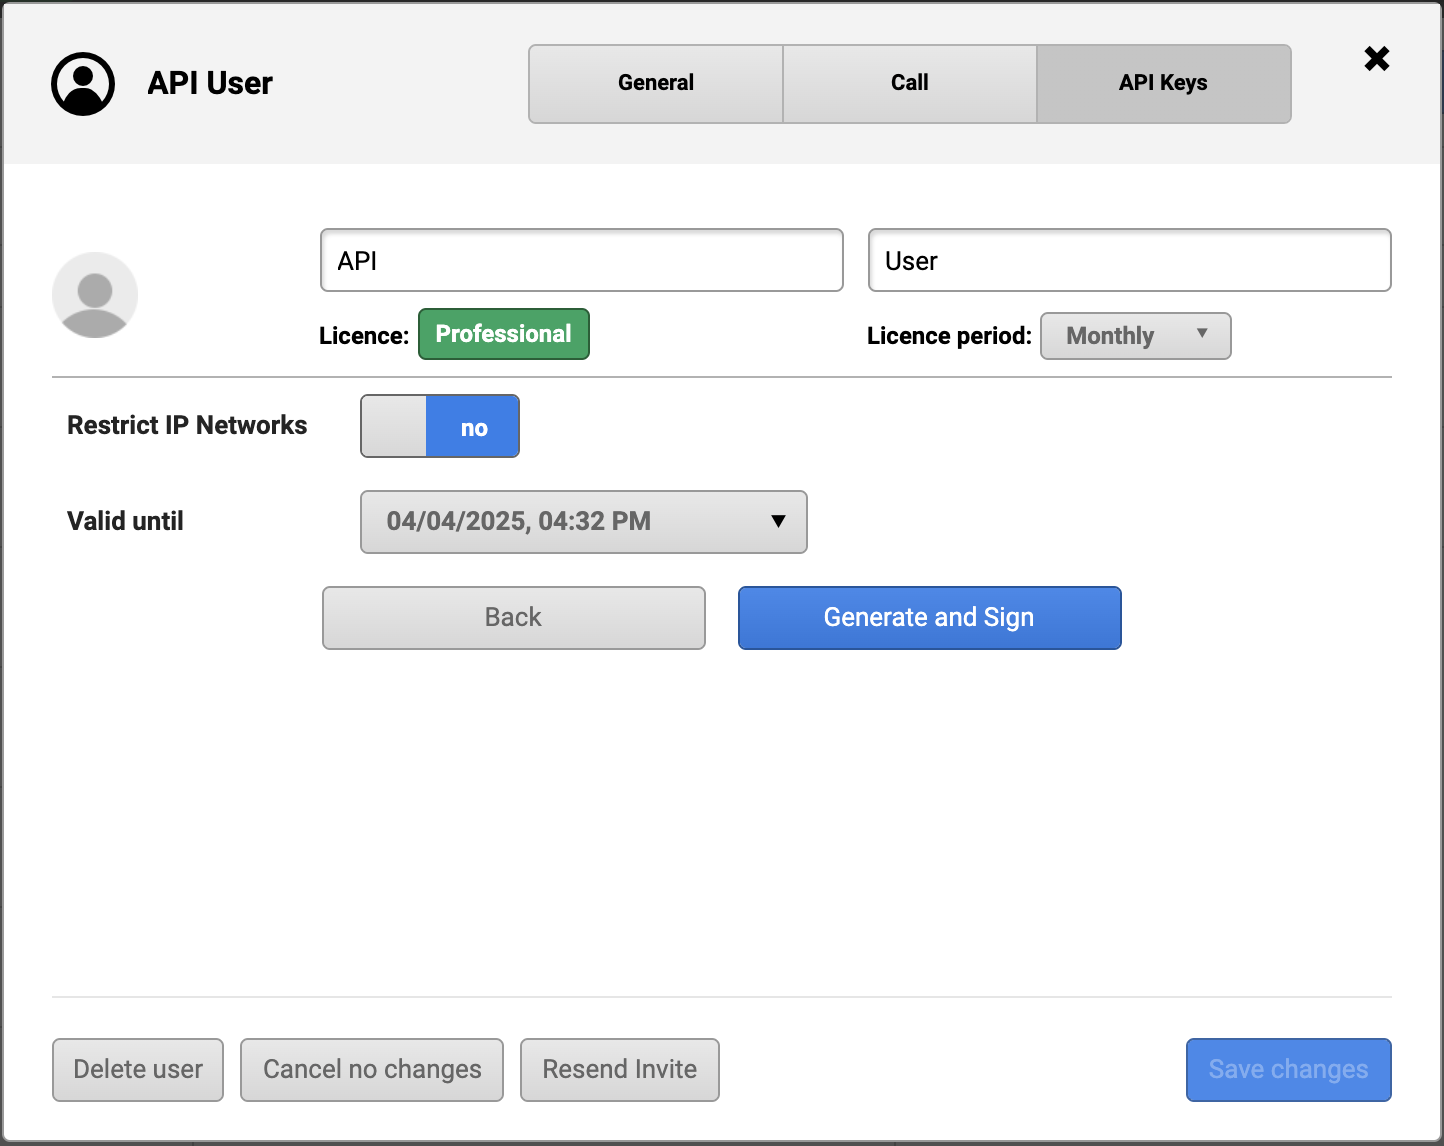
Define the parameters for the API key, specifically:
- Restrict IP Networks - should the key be accessible only from certain IP networks? If so, toggle the “no” button and type in the IP address/range to which the access should be restricted
- Valid until—define the duration of the key's validity. Access via this key will automatically become inactive after the date that you have selected. By default, one year is specified.
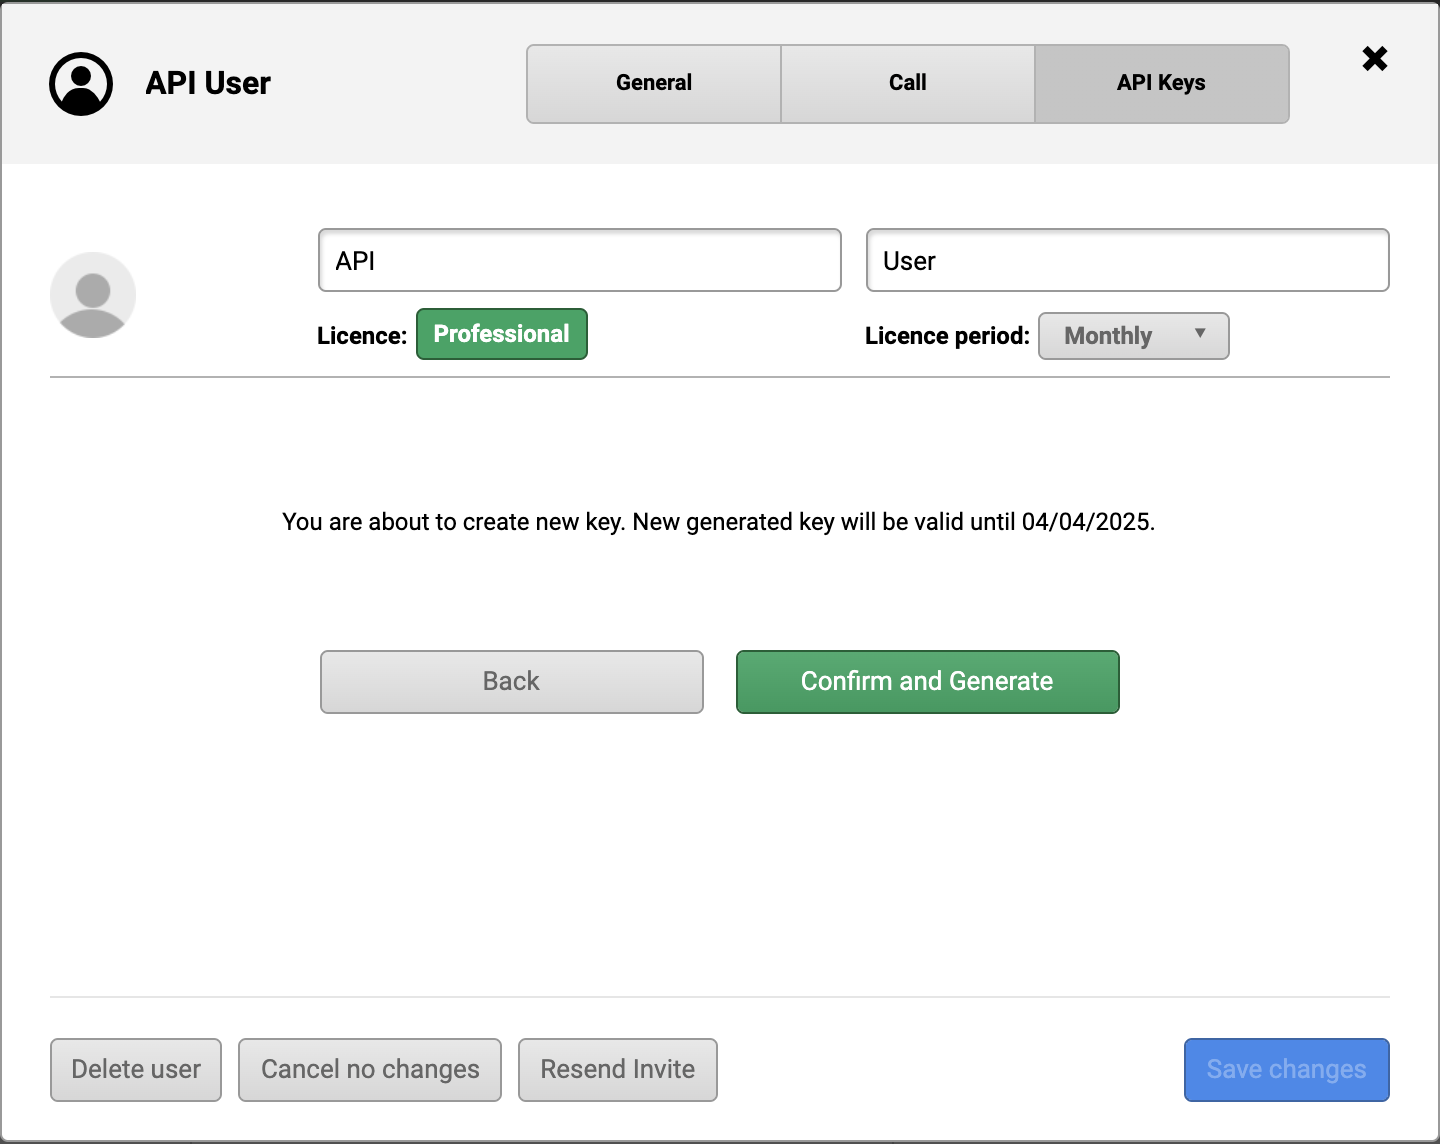
When you are ready to create the key, hit the blue button “Generate and Sign”.
You will be asked to confirm that you want to create the new key. Hit “Confirm and Generate” to confirm your selection.
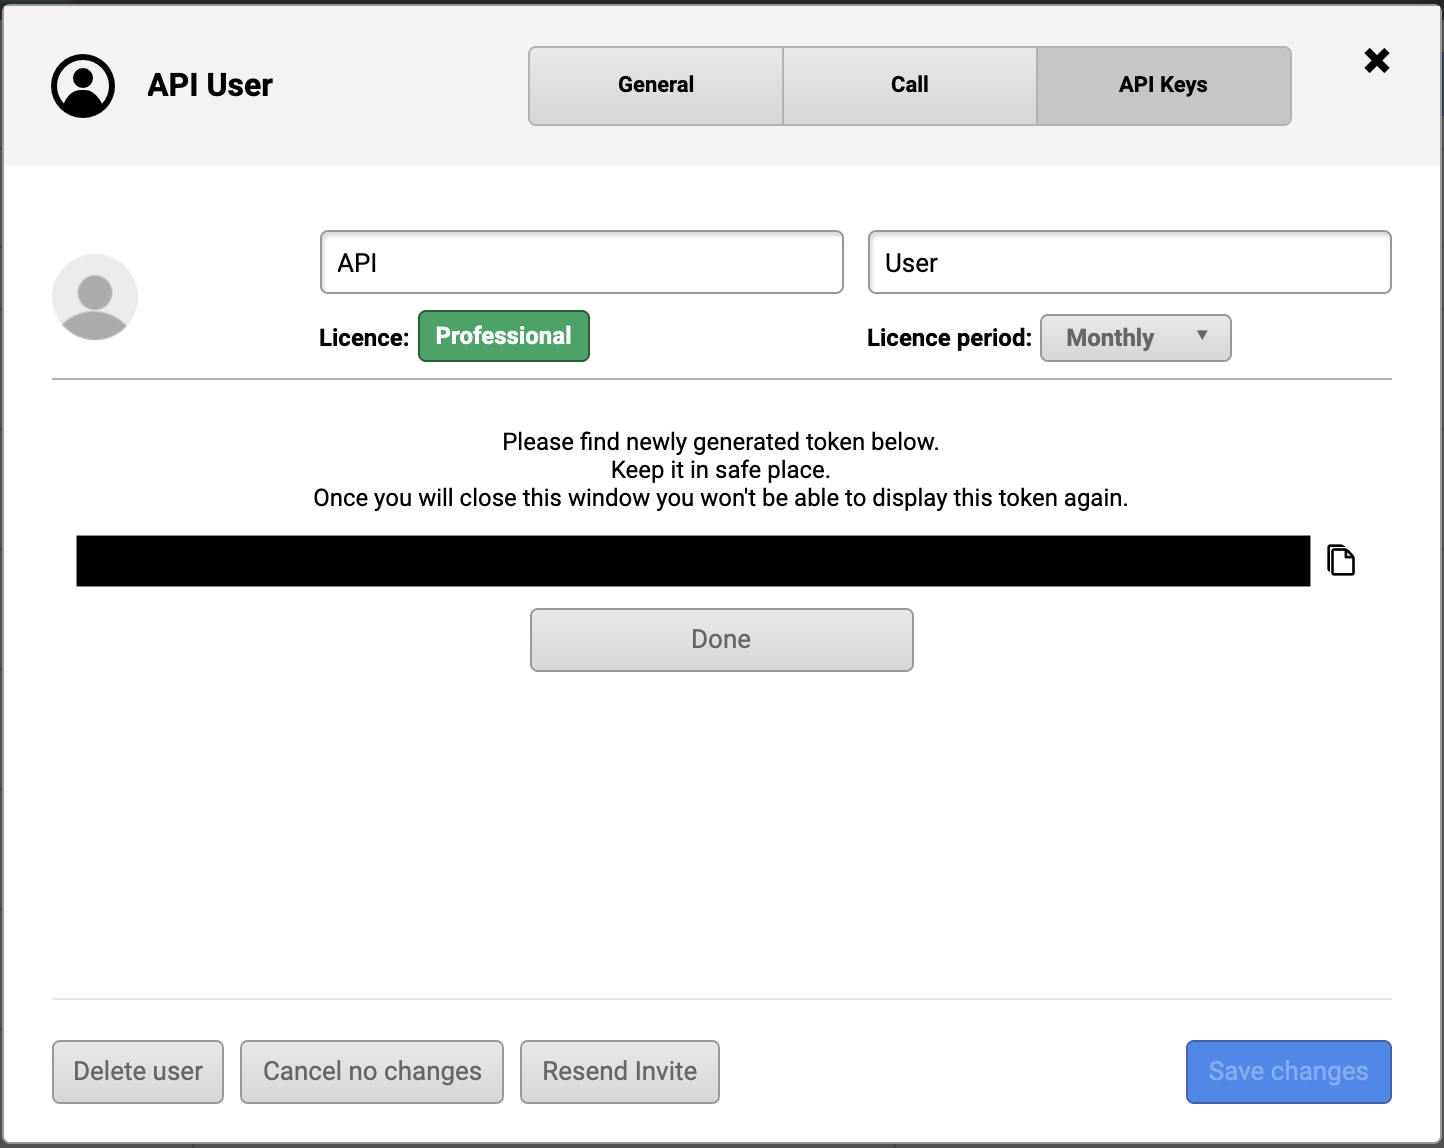
On the next page, you will see the newly generated API key. Hit the copy button next to it to copy the key, and keep it somewhere safe. Once you have done this, you can hit the “Done” button.
This will take you back to the overview of the user's generated keys. Here, you can verify the expiry times of all active keys.
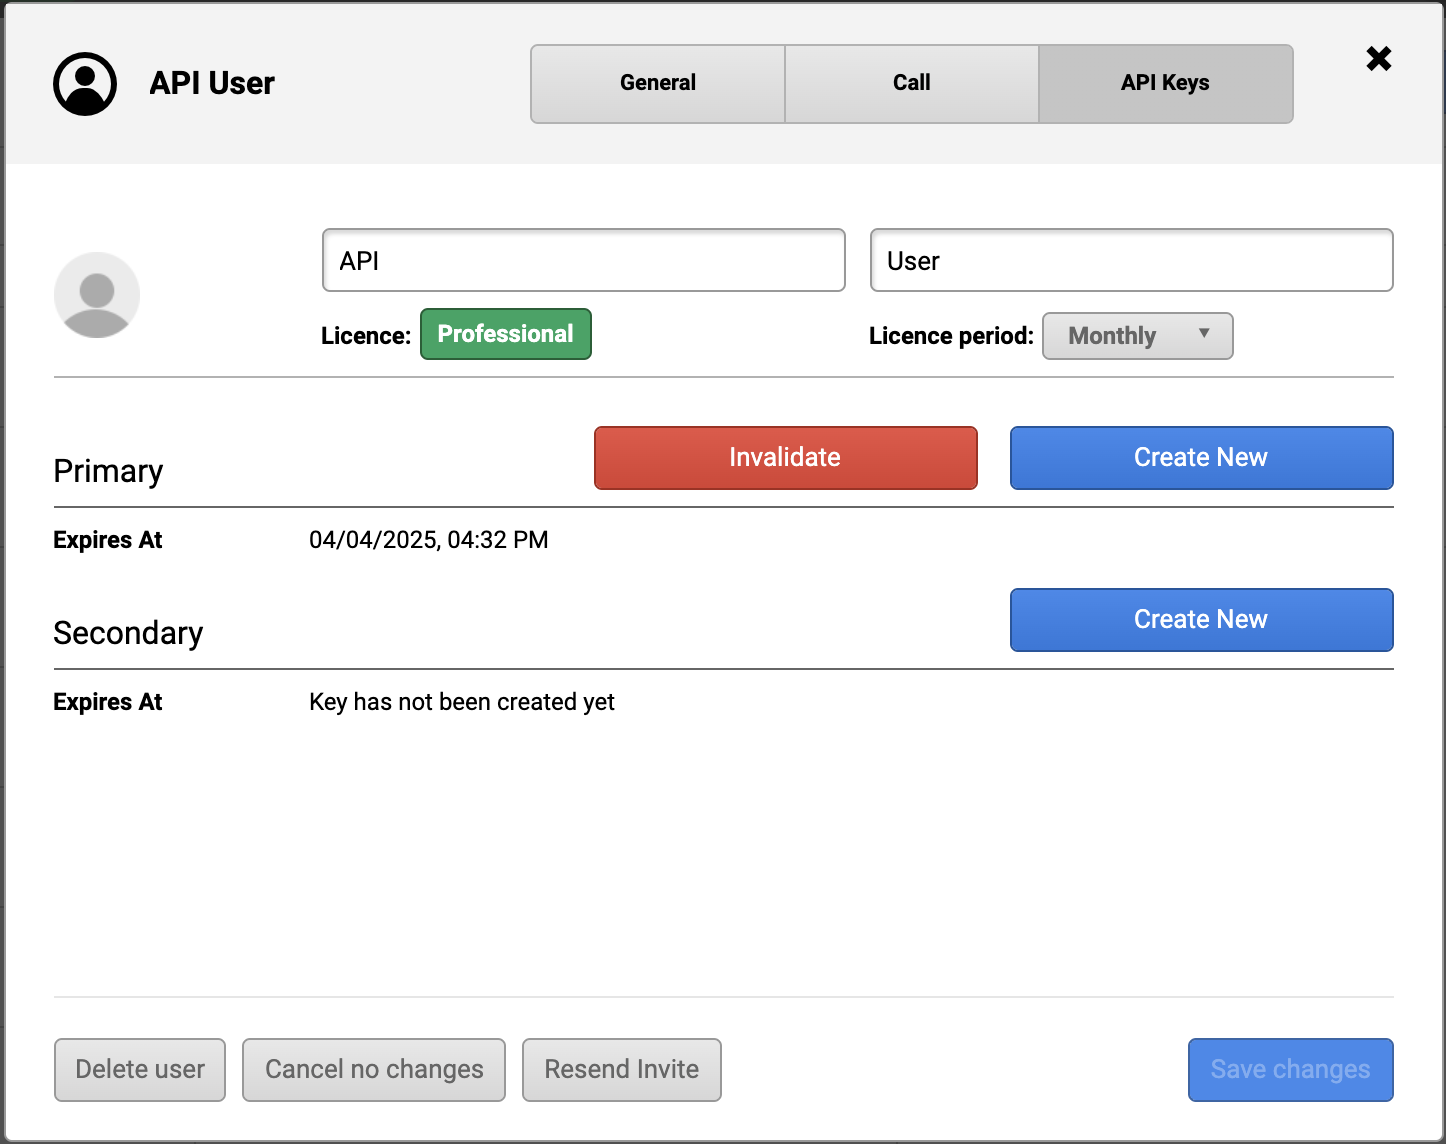
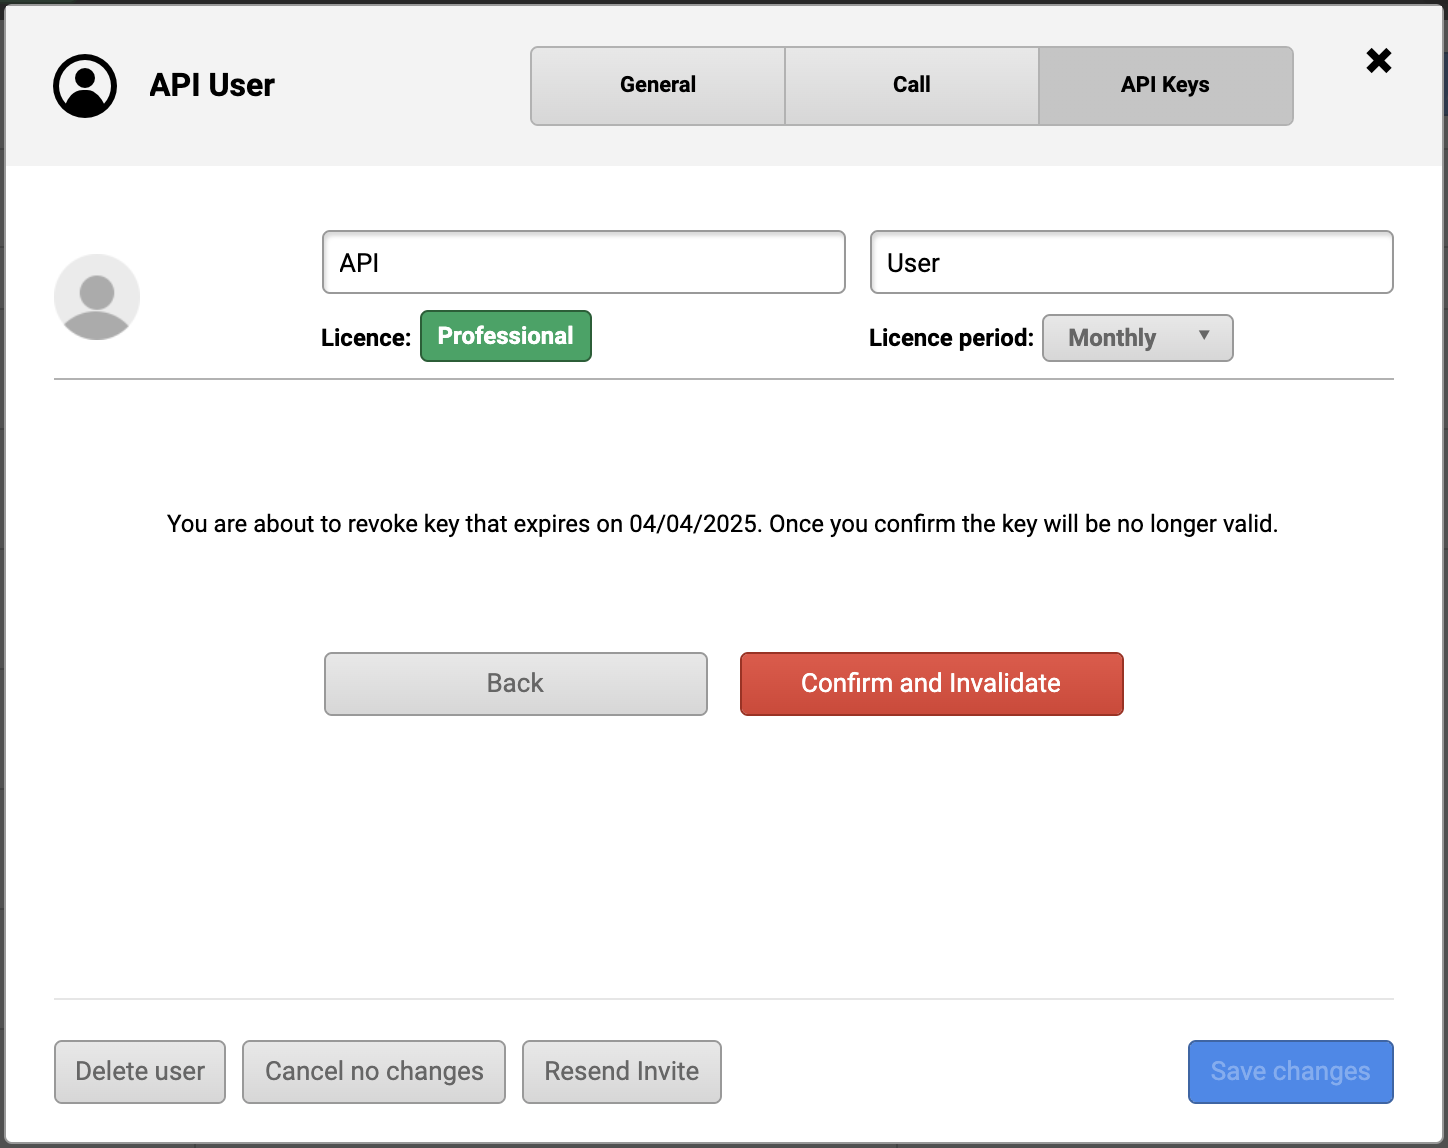
If you need to end a key's validity before it expires, you can use the red “Invalidate” button.
Upon clicking it, you will be asked to reconfirm the invalidation, which will cause the key to expire immediately.