Managing your customers’ teams is quick and straightforward—whether you’re inviting new members, updating details, or removing users who no longer need access. With just a few clicks, you can add essential information and make changes as needed.
Use this guide to learn how to invite, edit, and delete team members as a service provider, helping to keep users accurate and up to date.
Invite a new team member
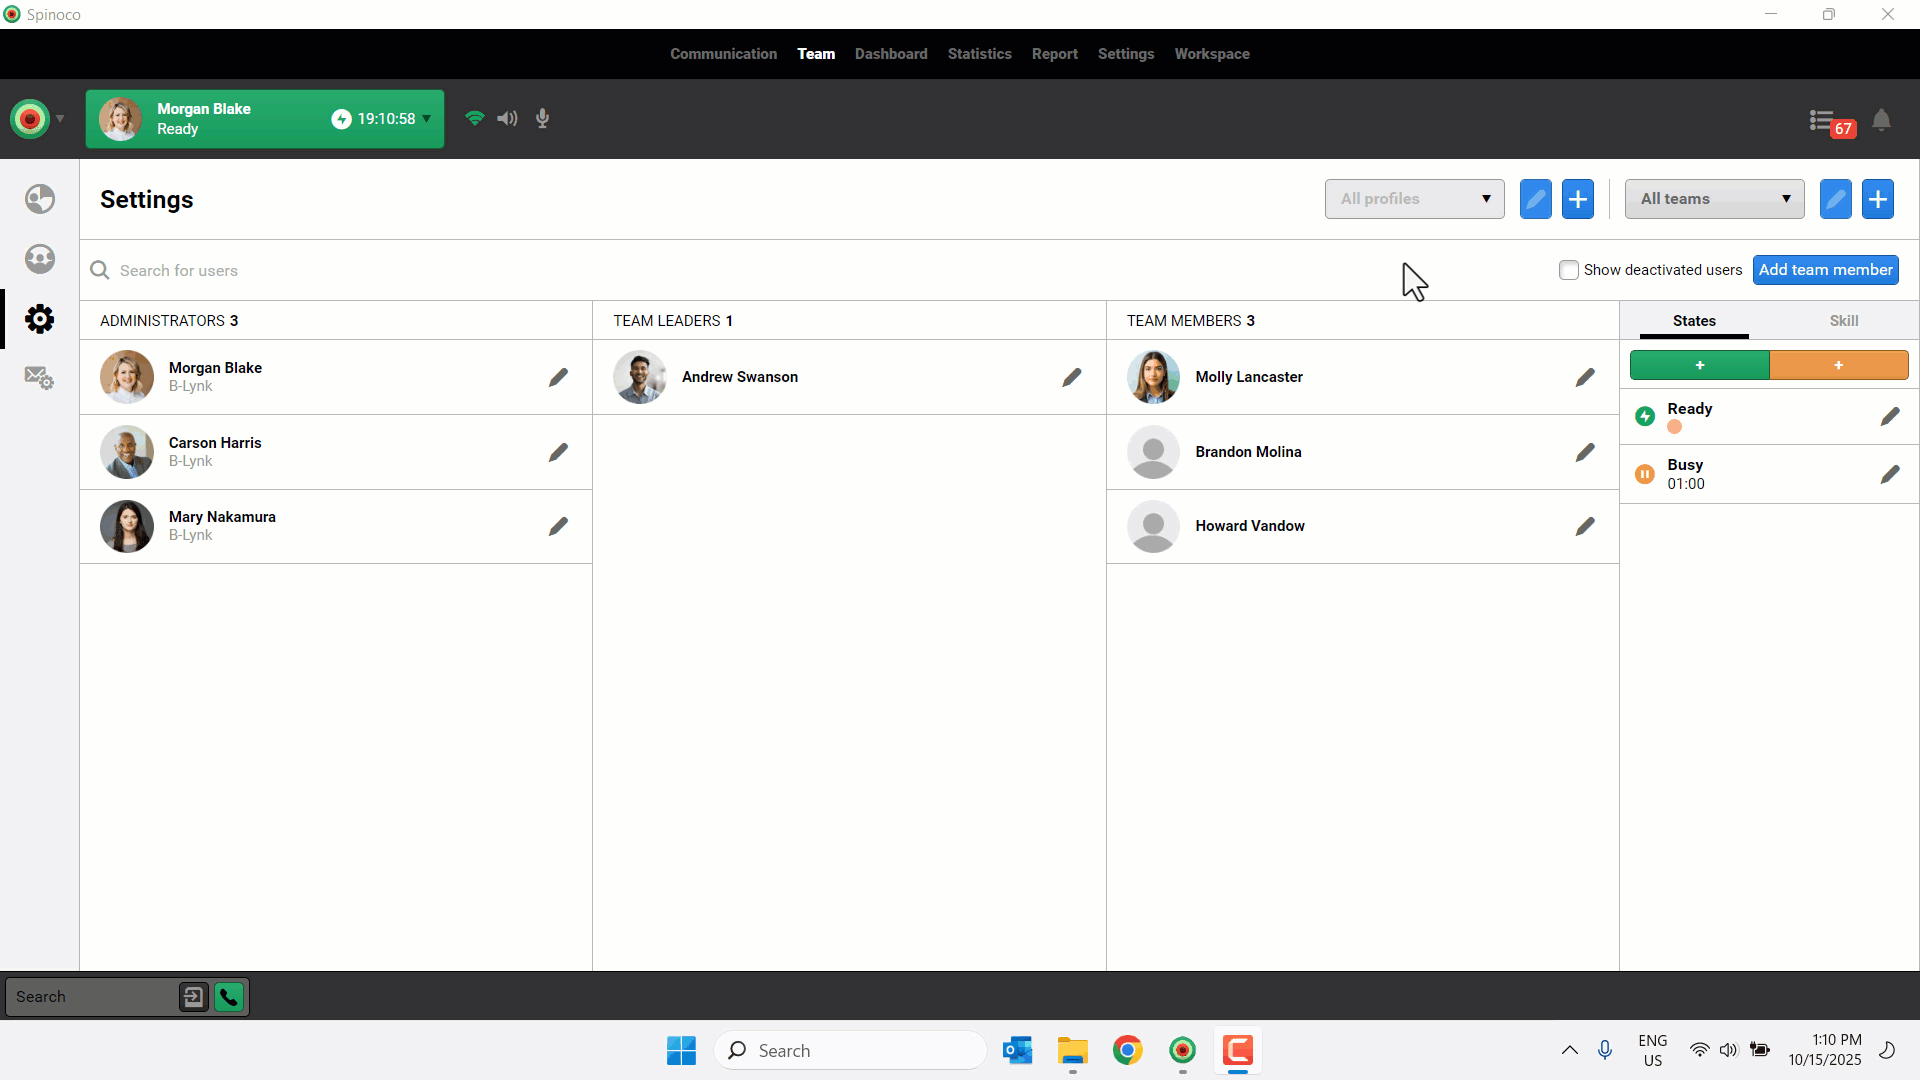
- Click Team.
- Select the settings icon.
- Click Add team member.
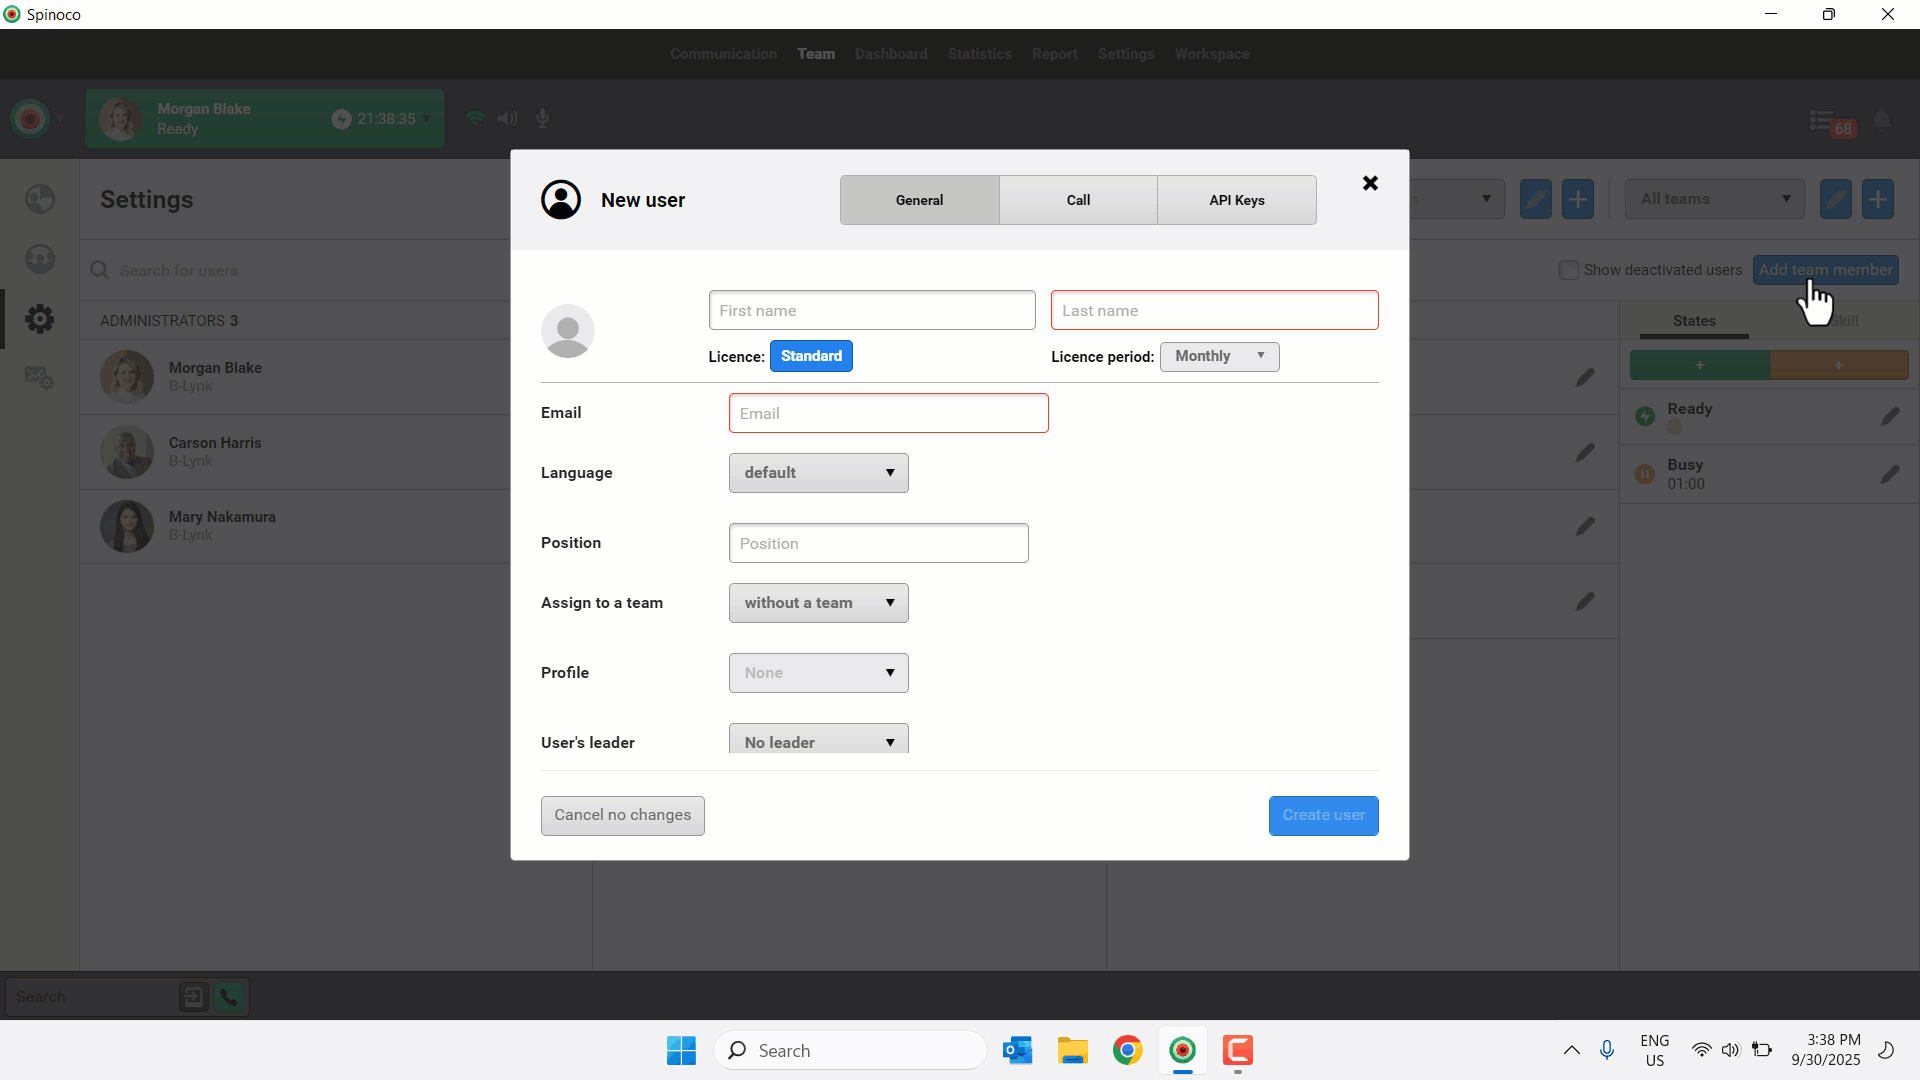
- Enter the user’s First name and Last name in the corresponding fields.
- Enter a valid Email address.
- Complete the following fields, if necessary: Language, Position, Assign to a team, Profile, and User’s leader.
- Select a User role.
- Assign User’s permissions.
- (Optional) Assign SELECTED SKILLS to the user.
- Click Create user.
Edit a user
- Click Team.
- Select the settings icon.
- Click the edit icon next to the desired user.
- Make your desired changes.
- Click Save changes.

Delete a user
- Click Team.
- Select the settings icon.
- Click the edit icon next to the desired user.
- Click Delete user.
- Confirm that you wish to delete the user by clicking Delete user.
To reactivate a deleted user:
- Check Show deactivated users. Deactivated users show up at the bottom of each list in a light gray color.
- Click the edit icon next to the desired deleted user.
- Optionally, modify the License period.
- Click Activate.